Banners
In order to create and manage consent banners, navigate to Banners on the left hand navigation. This page allows the ability to create a new consent banner, edit, and archive existing banners.
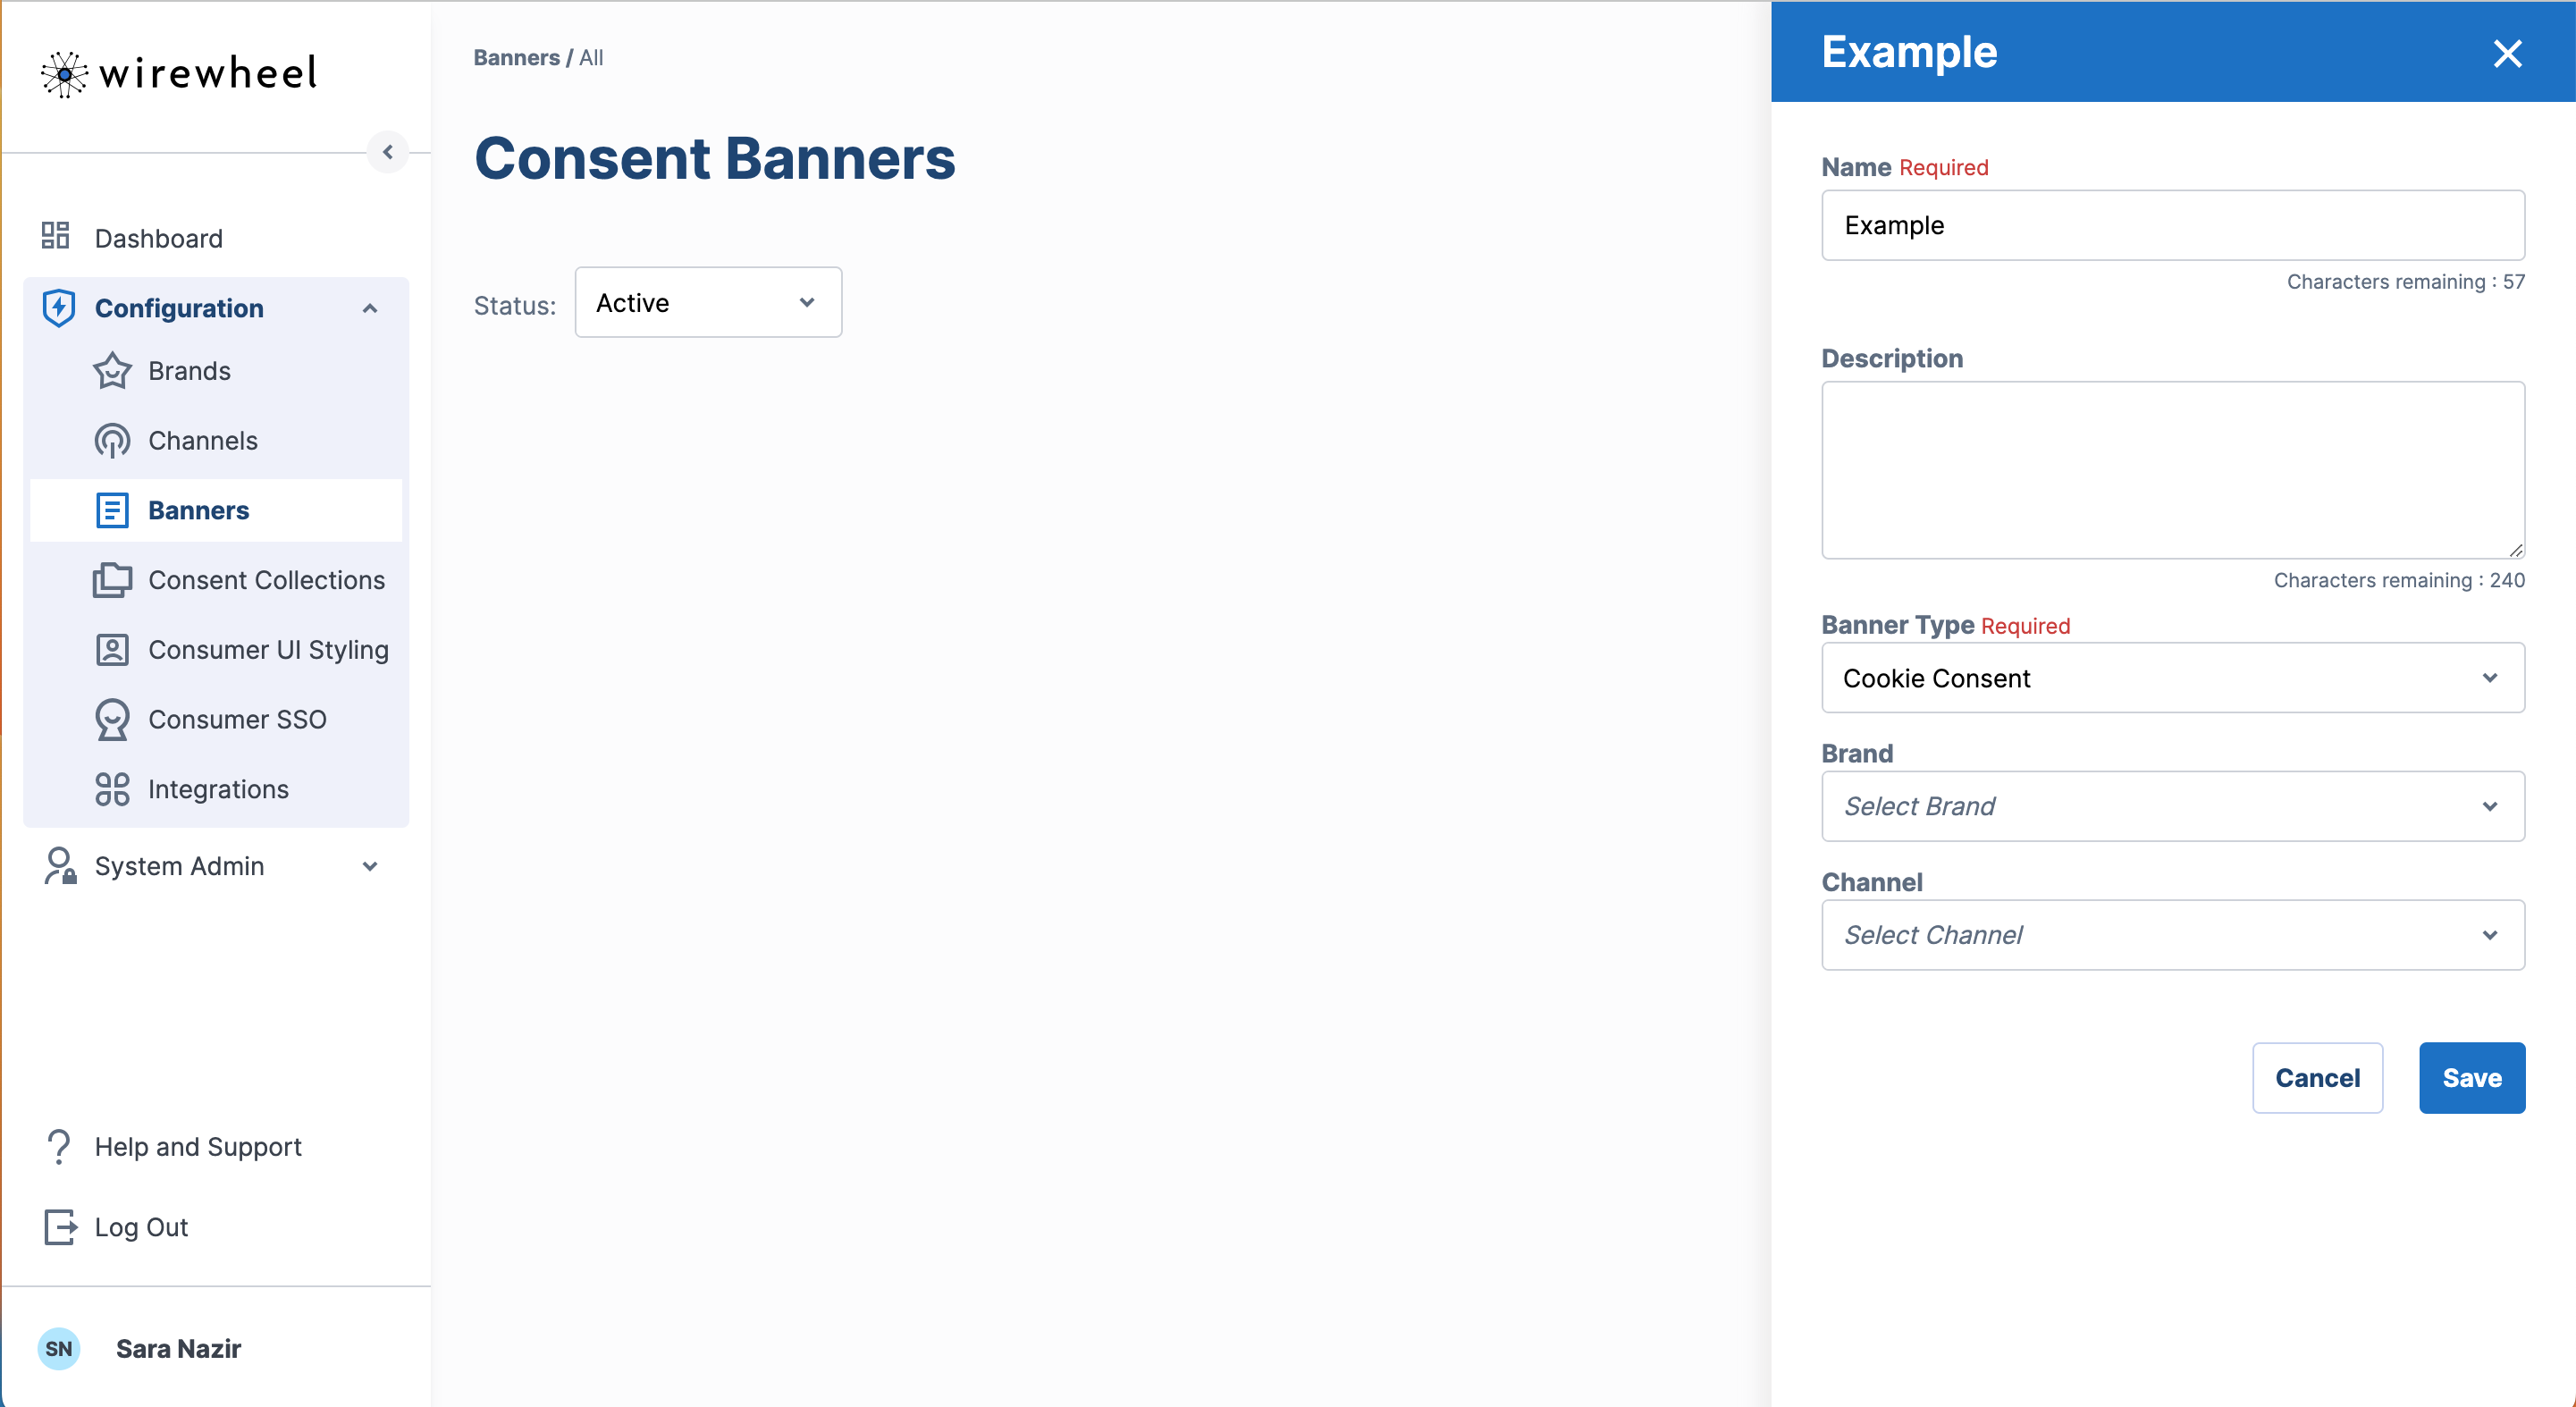
In the top right corner of the page, Create Consent Banner opens a flyout to input the banner name and a description. Once that is saved, the banner may now be set up and configured.
There are five main areas to configure your banner.
- General - Includes adding domains and languages support
- Configuration - Setting up optionality for the banner
- Data Processing Services - Provides information around cookies & tags discovered through the Site Scanner and allows for the categorization of services
- Manage Categories - Includes adding custom categories and managing existing ones
- Content - Includes adding the default text and other supporting language translations
- Implementation - Includes publishing banner settings.
General
Start by adding the domain's for the site(s) that this banner will be displayed. Then proceed to add the languages that the banner will support. When you Save, UPCP's Site Scanner will be automatically kicked off!
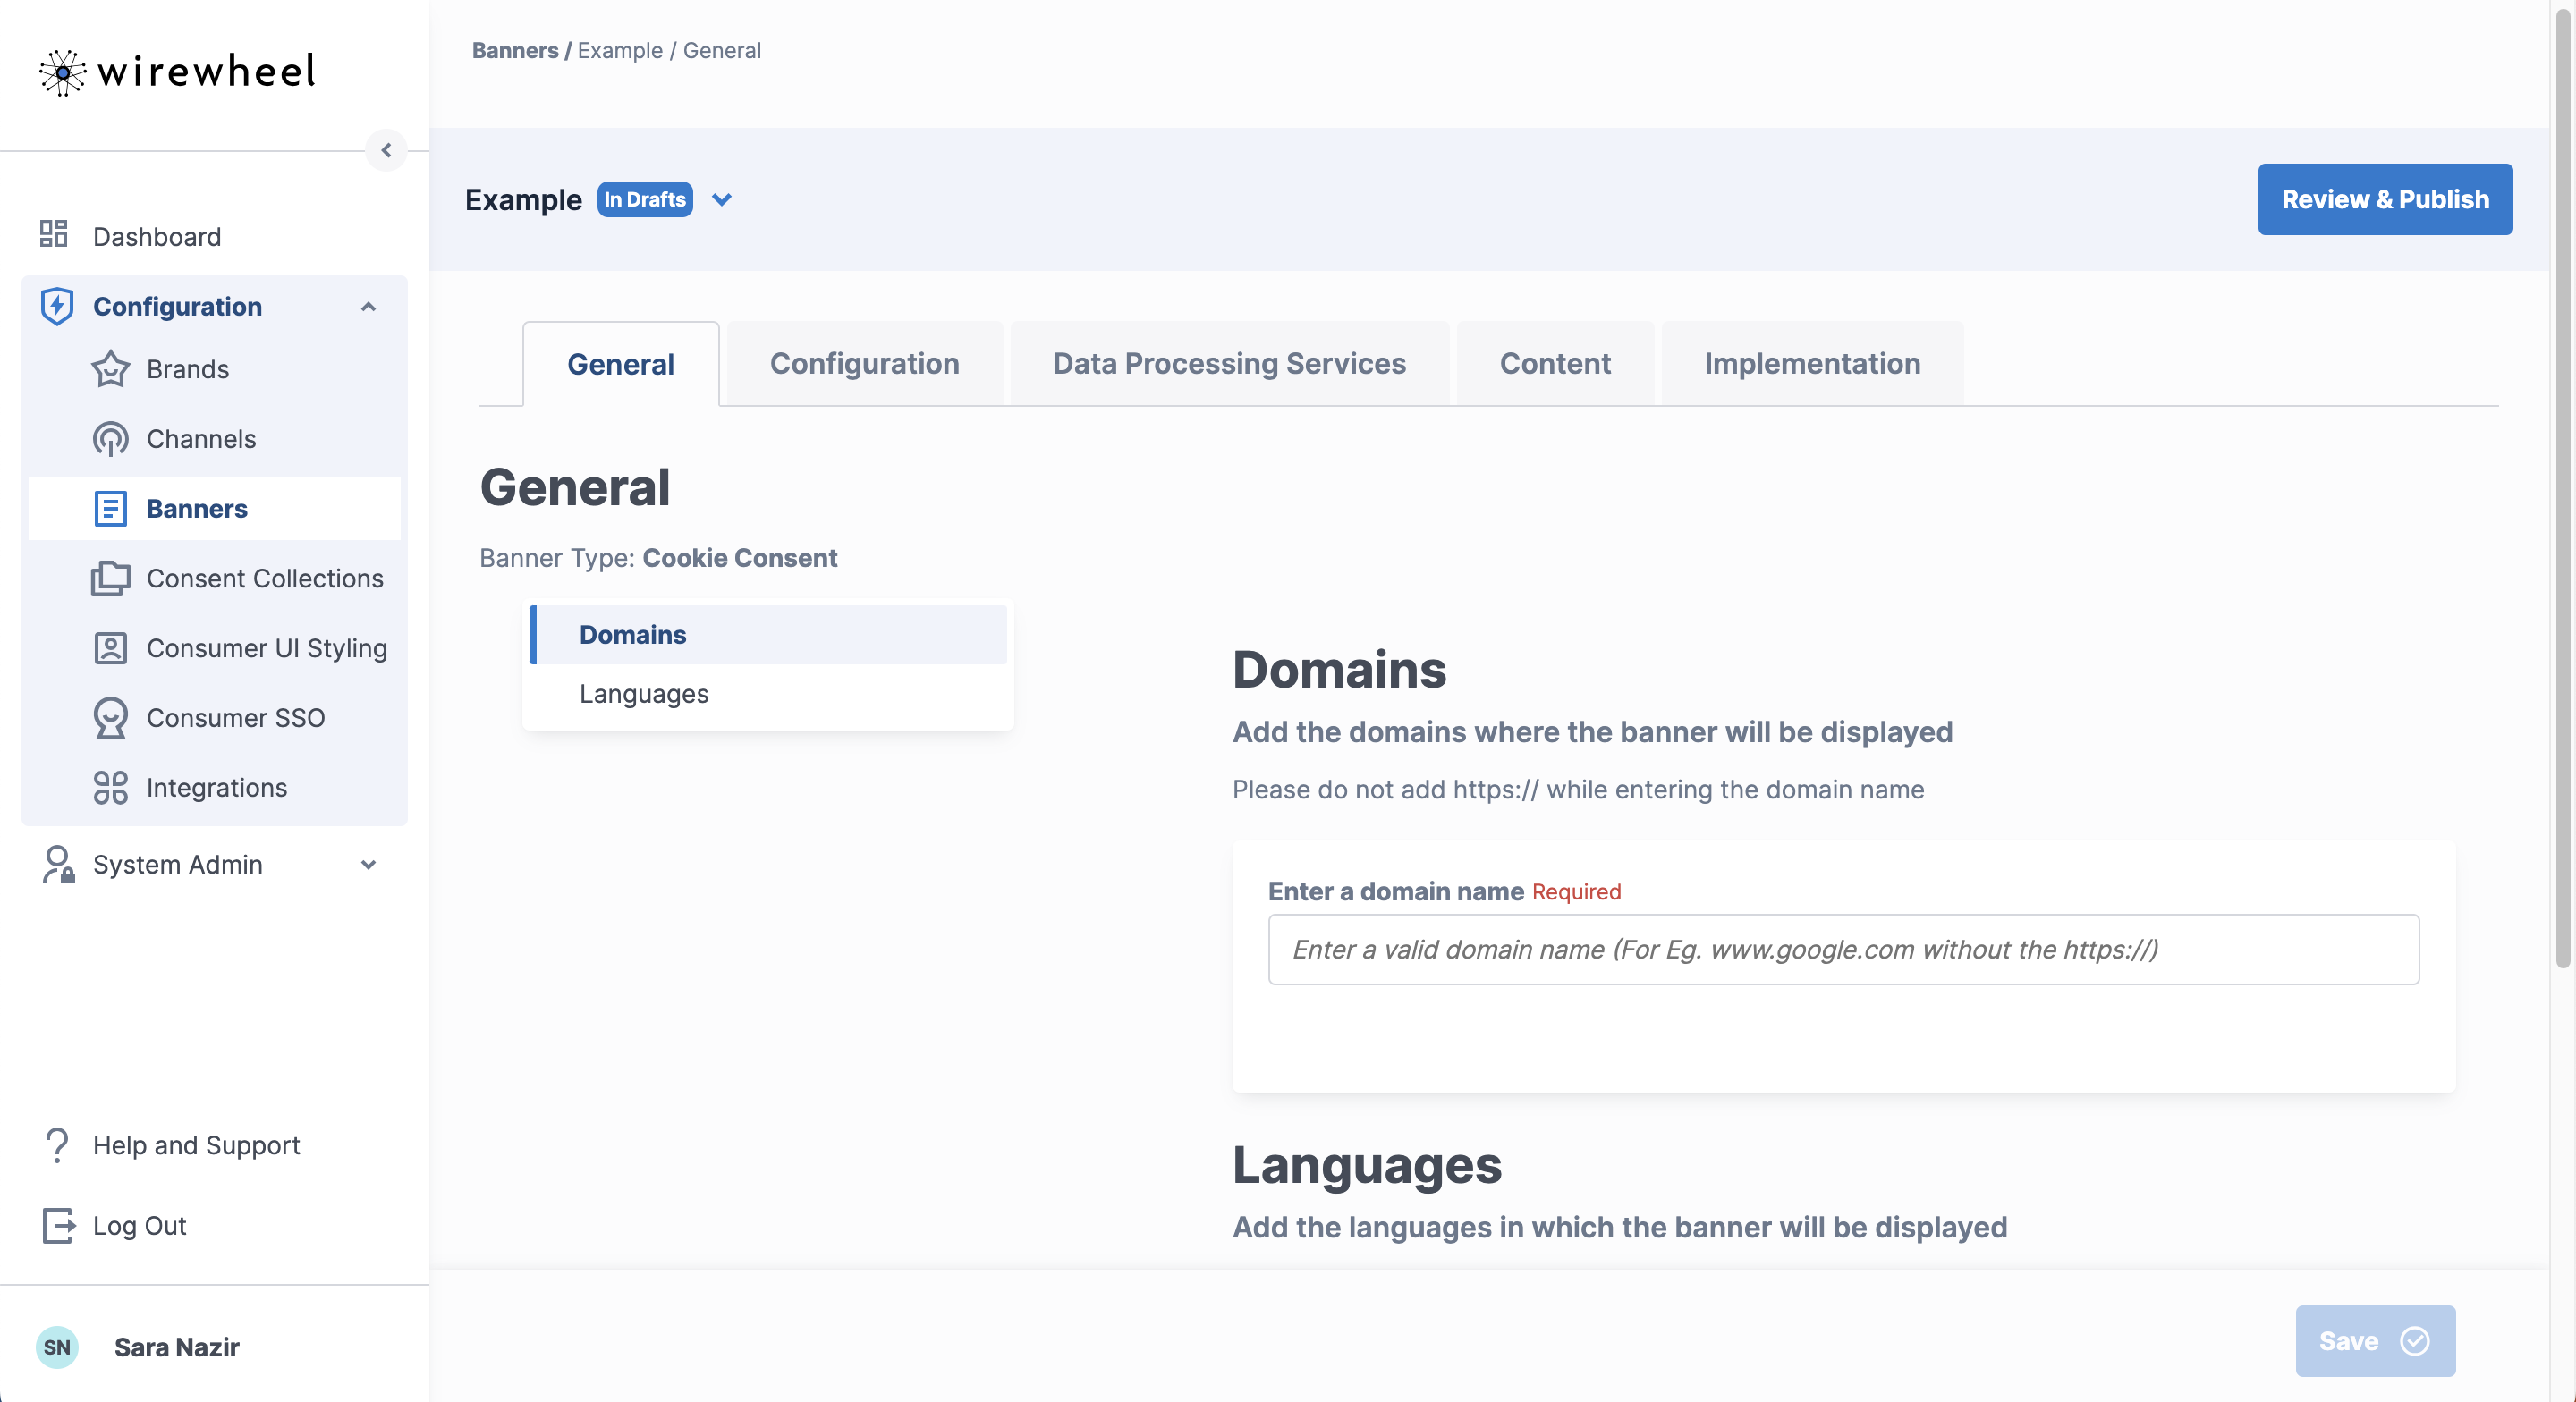
Adding Domains
Add one or more domains in this area. Domains should be added minus the protocol or path. For example, if adding https://www.google.com/analytics, you would enter:
Adding Languages
In this section, please add the languages that this banner will be renderable in. The live banner will automatically attempt to render in the user's preferred language as set in the user's browser. However if that language is not supported by this banner, then banner will fallback to the Default Language. The set up and input of the text will be completed in the Texts and Translations section.
Site Scanner
The Site Scanner will crawl the domains added here. It will look for Data Processing Services auto-categorize known services. More about this in the Data Processing Services section. This on-demand scan will occur every time you add a domain.
Configuration
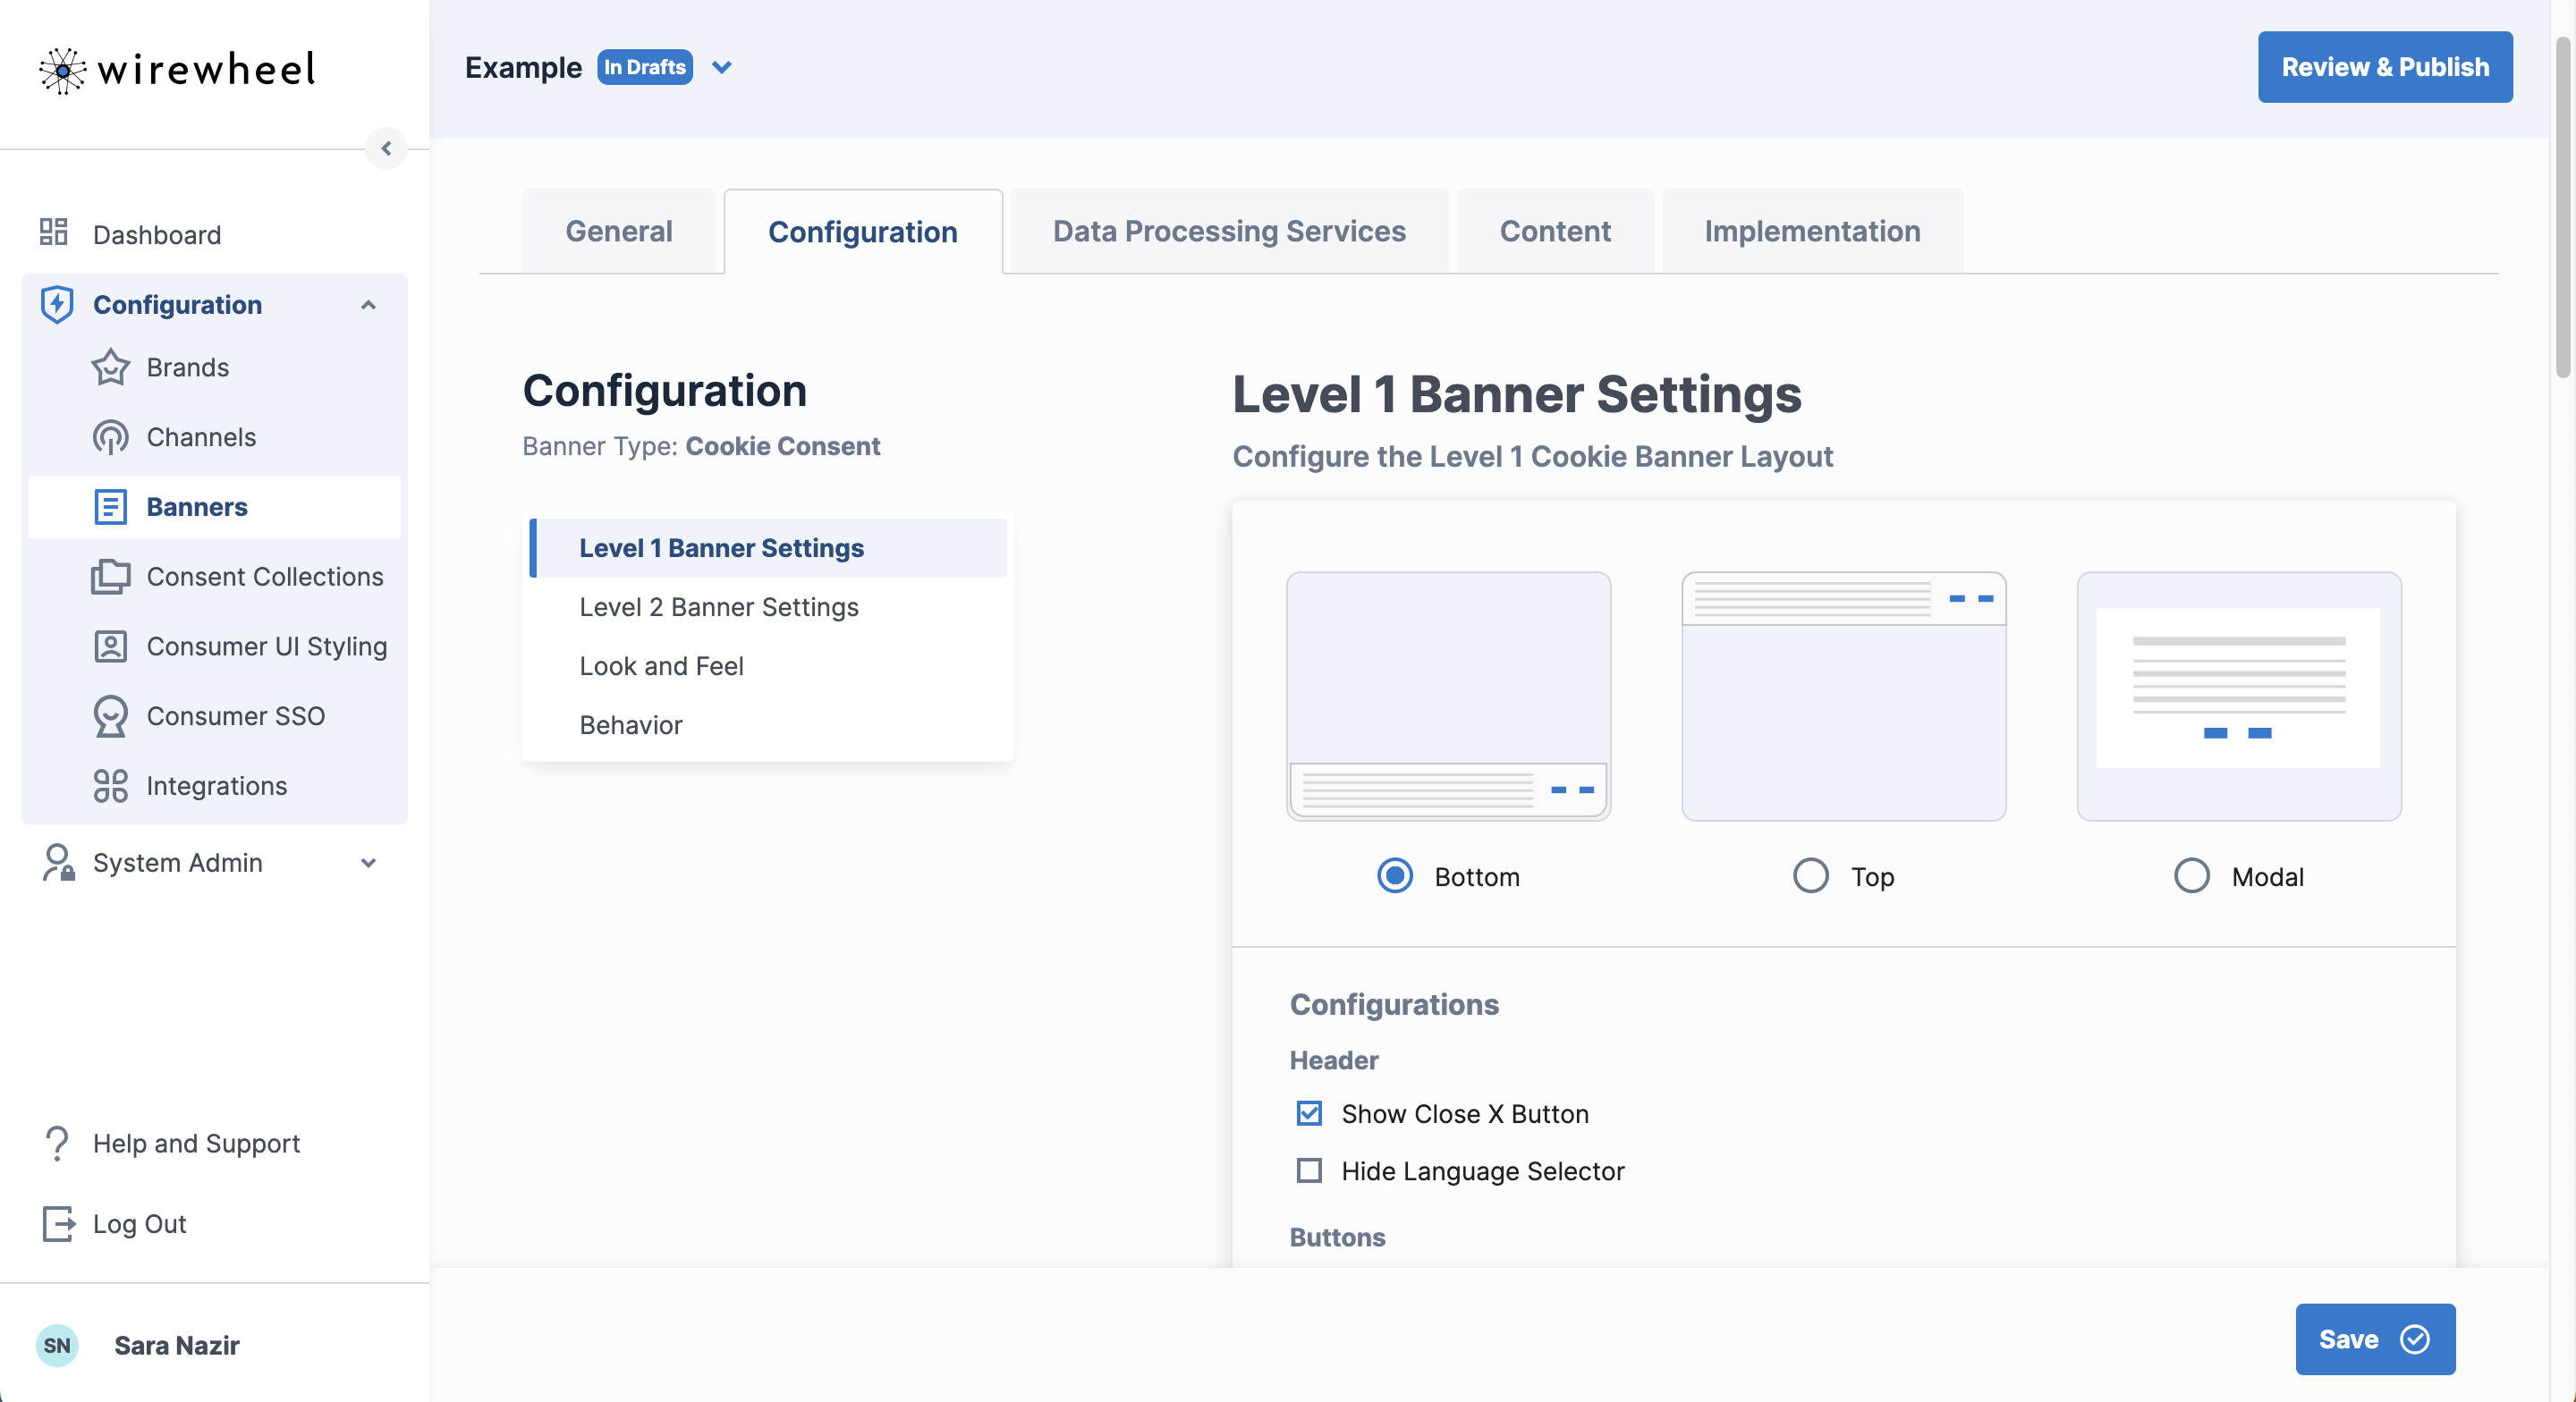
This page displays all the settings to customize a banner. It is organized by 4 areas: Level 1 Banner Settings, Level 2 Banner Settings, Look and Feel, and Behavior.
Level 1 Banner Settings - Controls the configuration for all elements on the Level 1 Banner. This includes position buttons, and link settings.
Level 2 Banner Settings - Controls the configuration for all elements on the Level 2 Banner. This includes categories, buttons, and link settings.
Look and Feel - Controls the display and customization settings of the banner. This includes selecting fonts and colors for all buttons & texts using the interface or through custom CSS.
Behavior - Controls the frequency and display conditions of the banner.
Data Processing Services
This page displays a snapshot of all the services within a banner and will include all entities picked up from the Site Scanner as well as any services added manually. The scanner has the ability to automatically categorize common services. If they are auto-categorized, the service will have a category set and will display the status Action Required. If you agree with the category, click Confirm. Once this is done, the status will change to Assigned. If the suggested category classified by the Site Scanner is incorrect, select the correct one from the category dropdown and confirm the action.
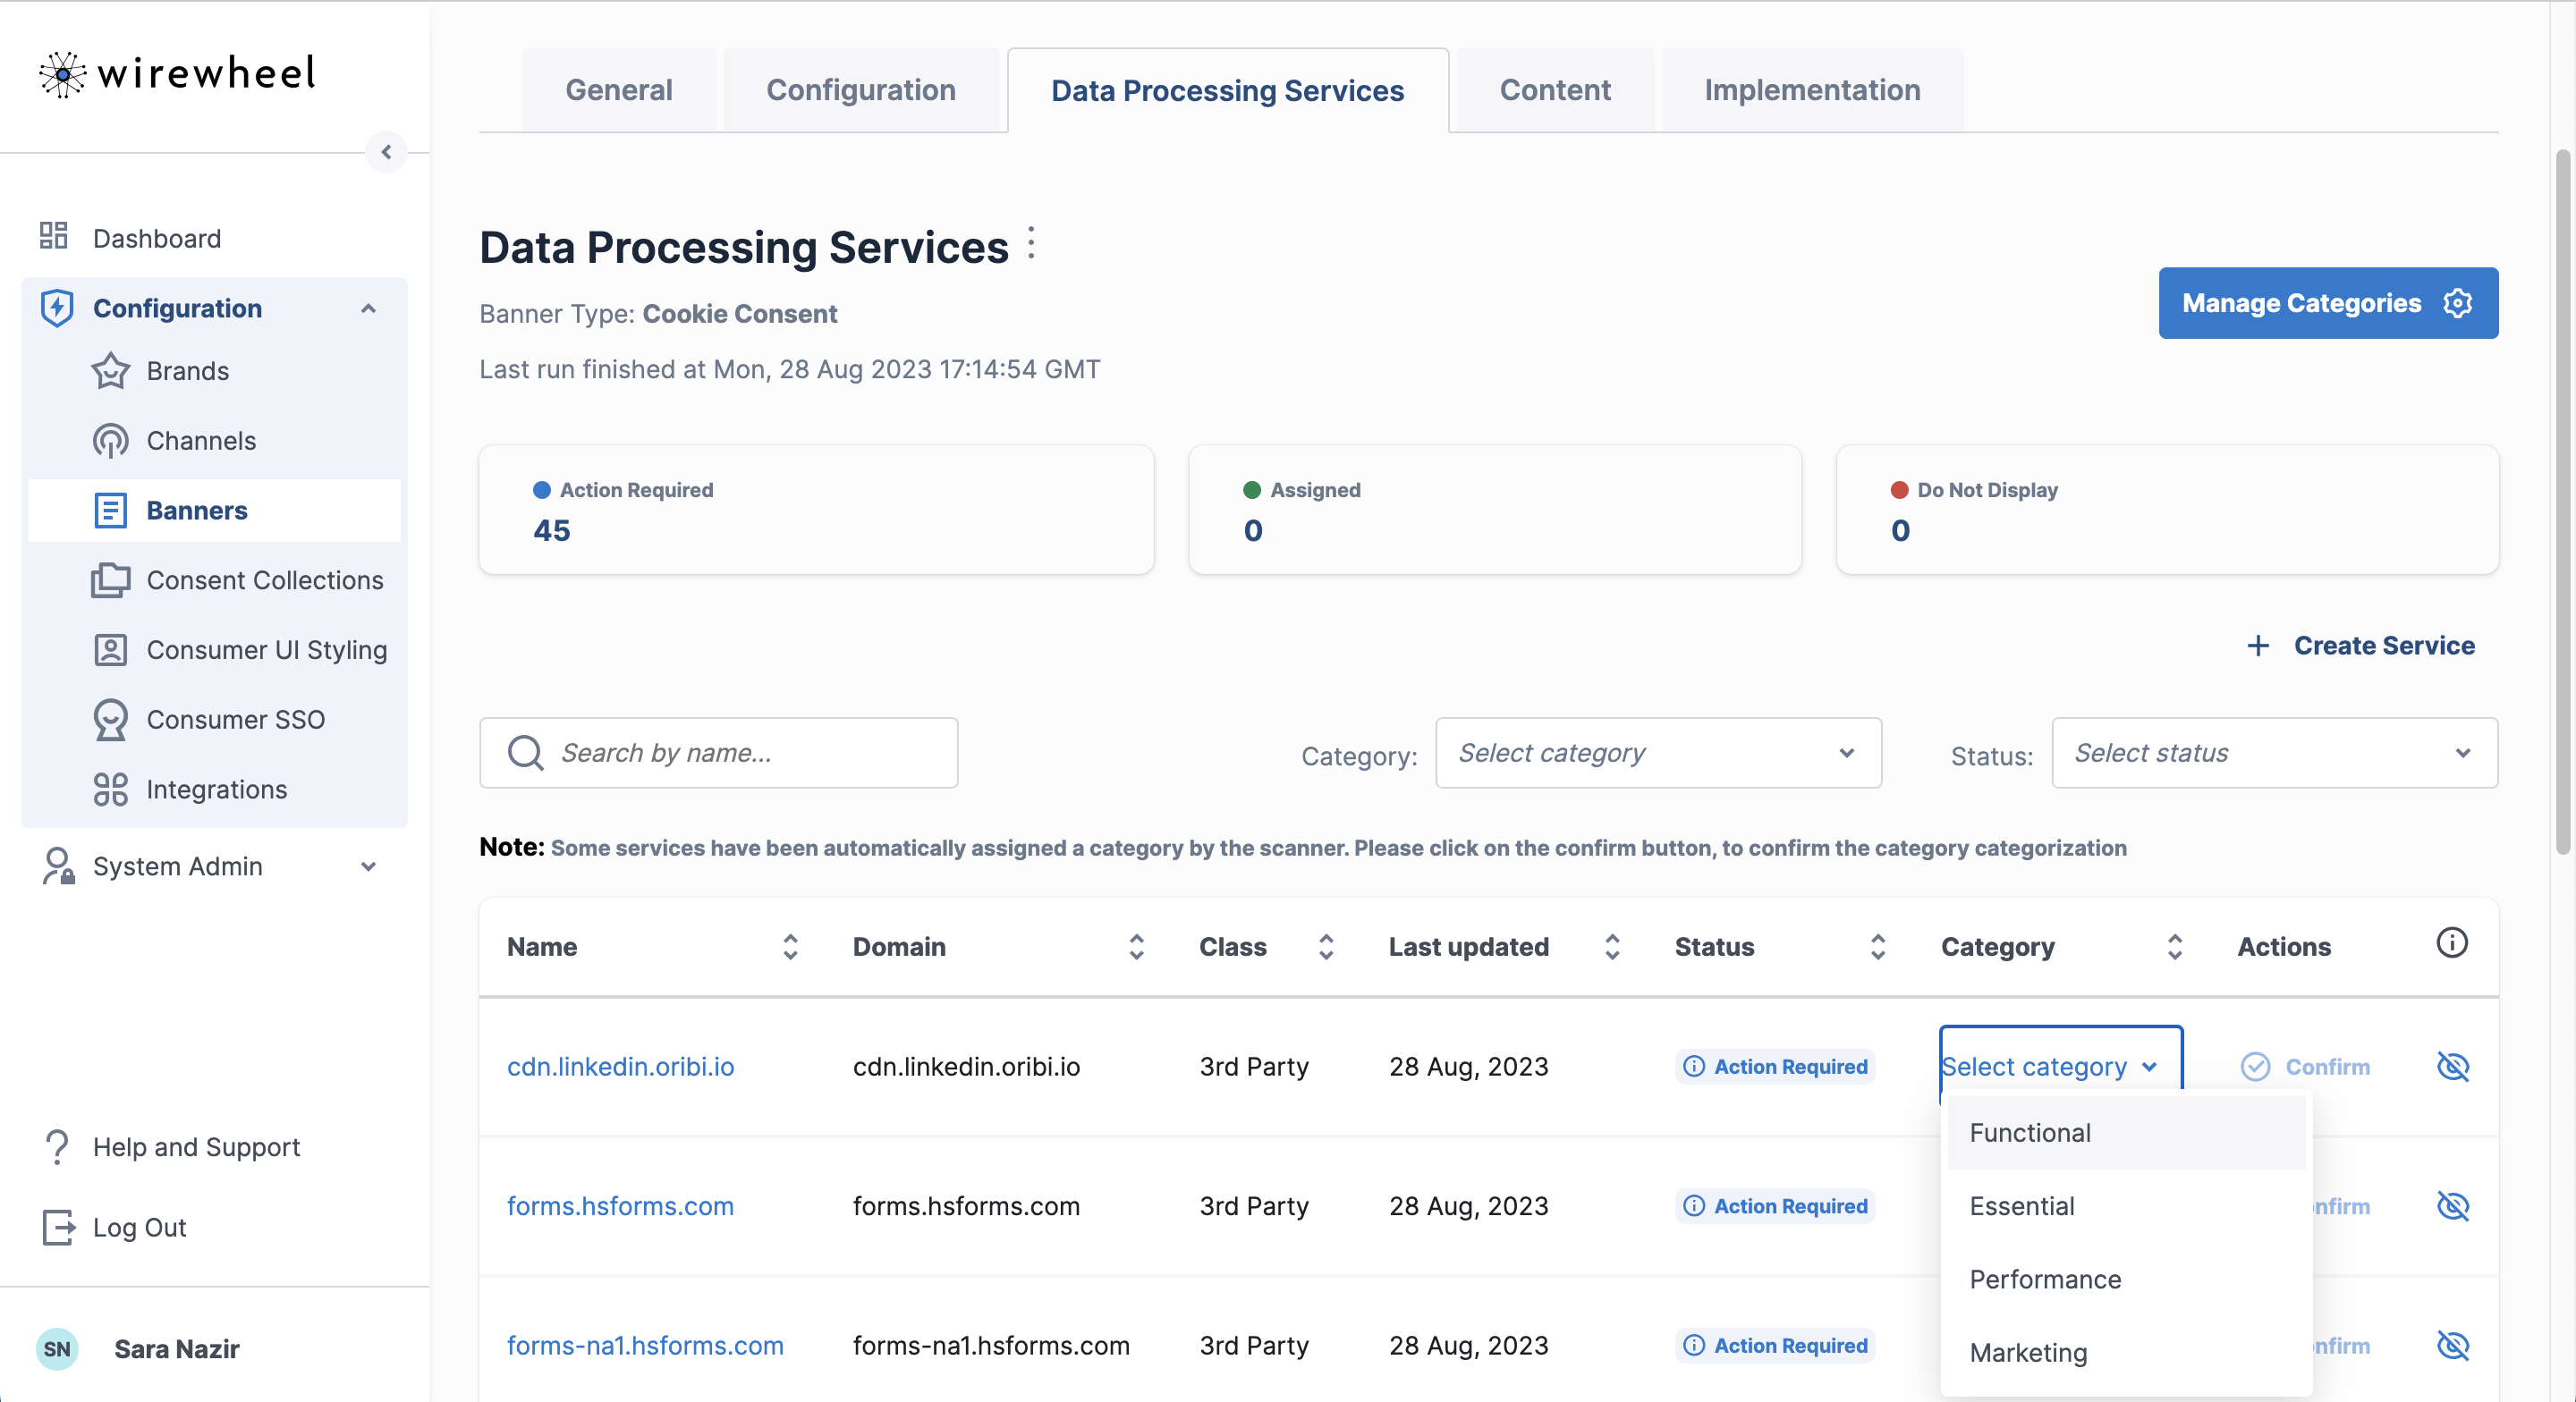
If you want to run a new on-demand scan, click on the ellipses next to Data Processing Services and click Run Scanner. The scanner will begin to crawl the configured domains. Once complete, the "Last Run" timestamp will be updated and any new services will be ready for categorization.
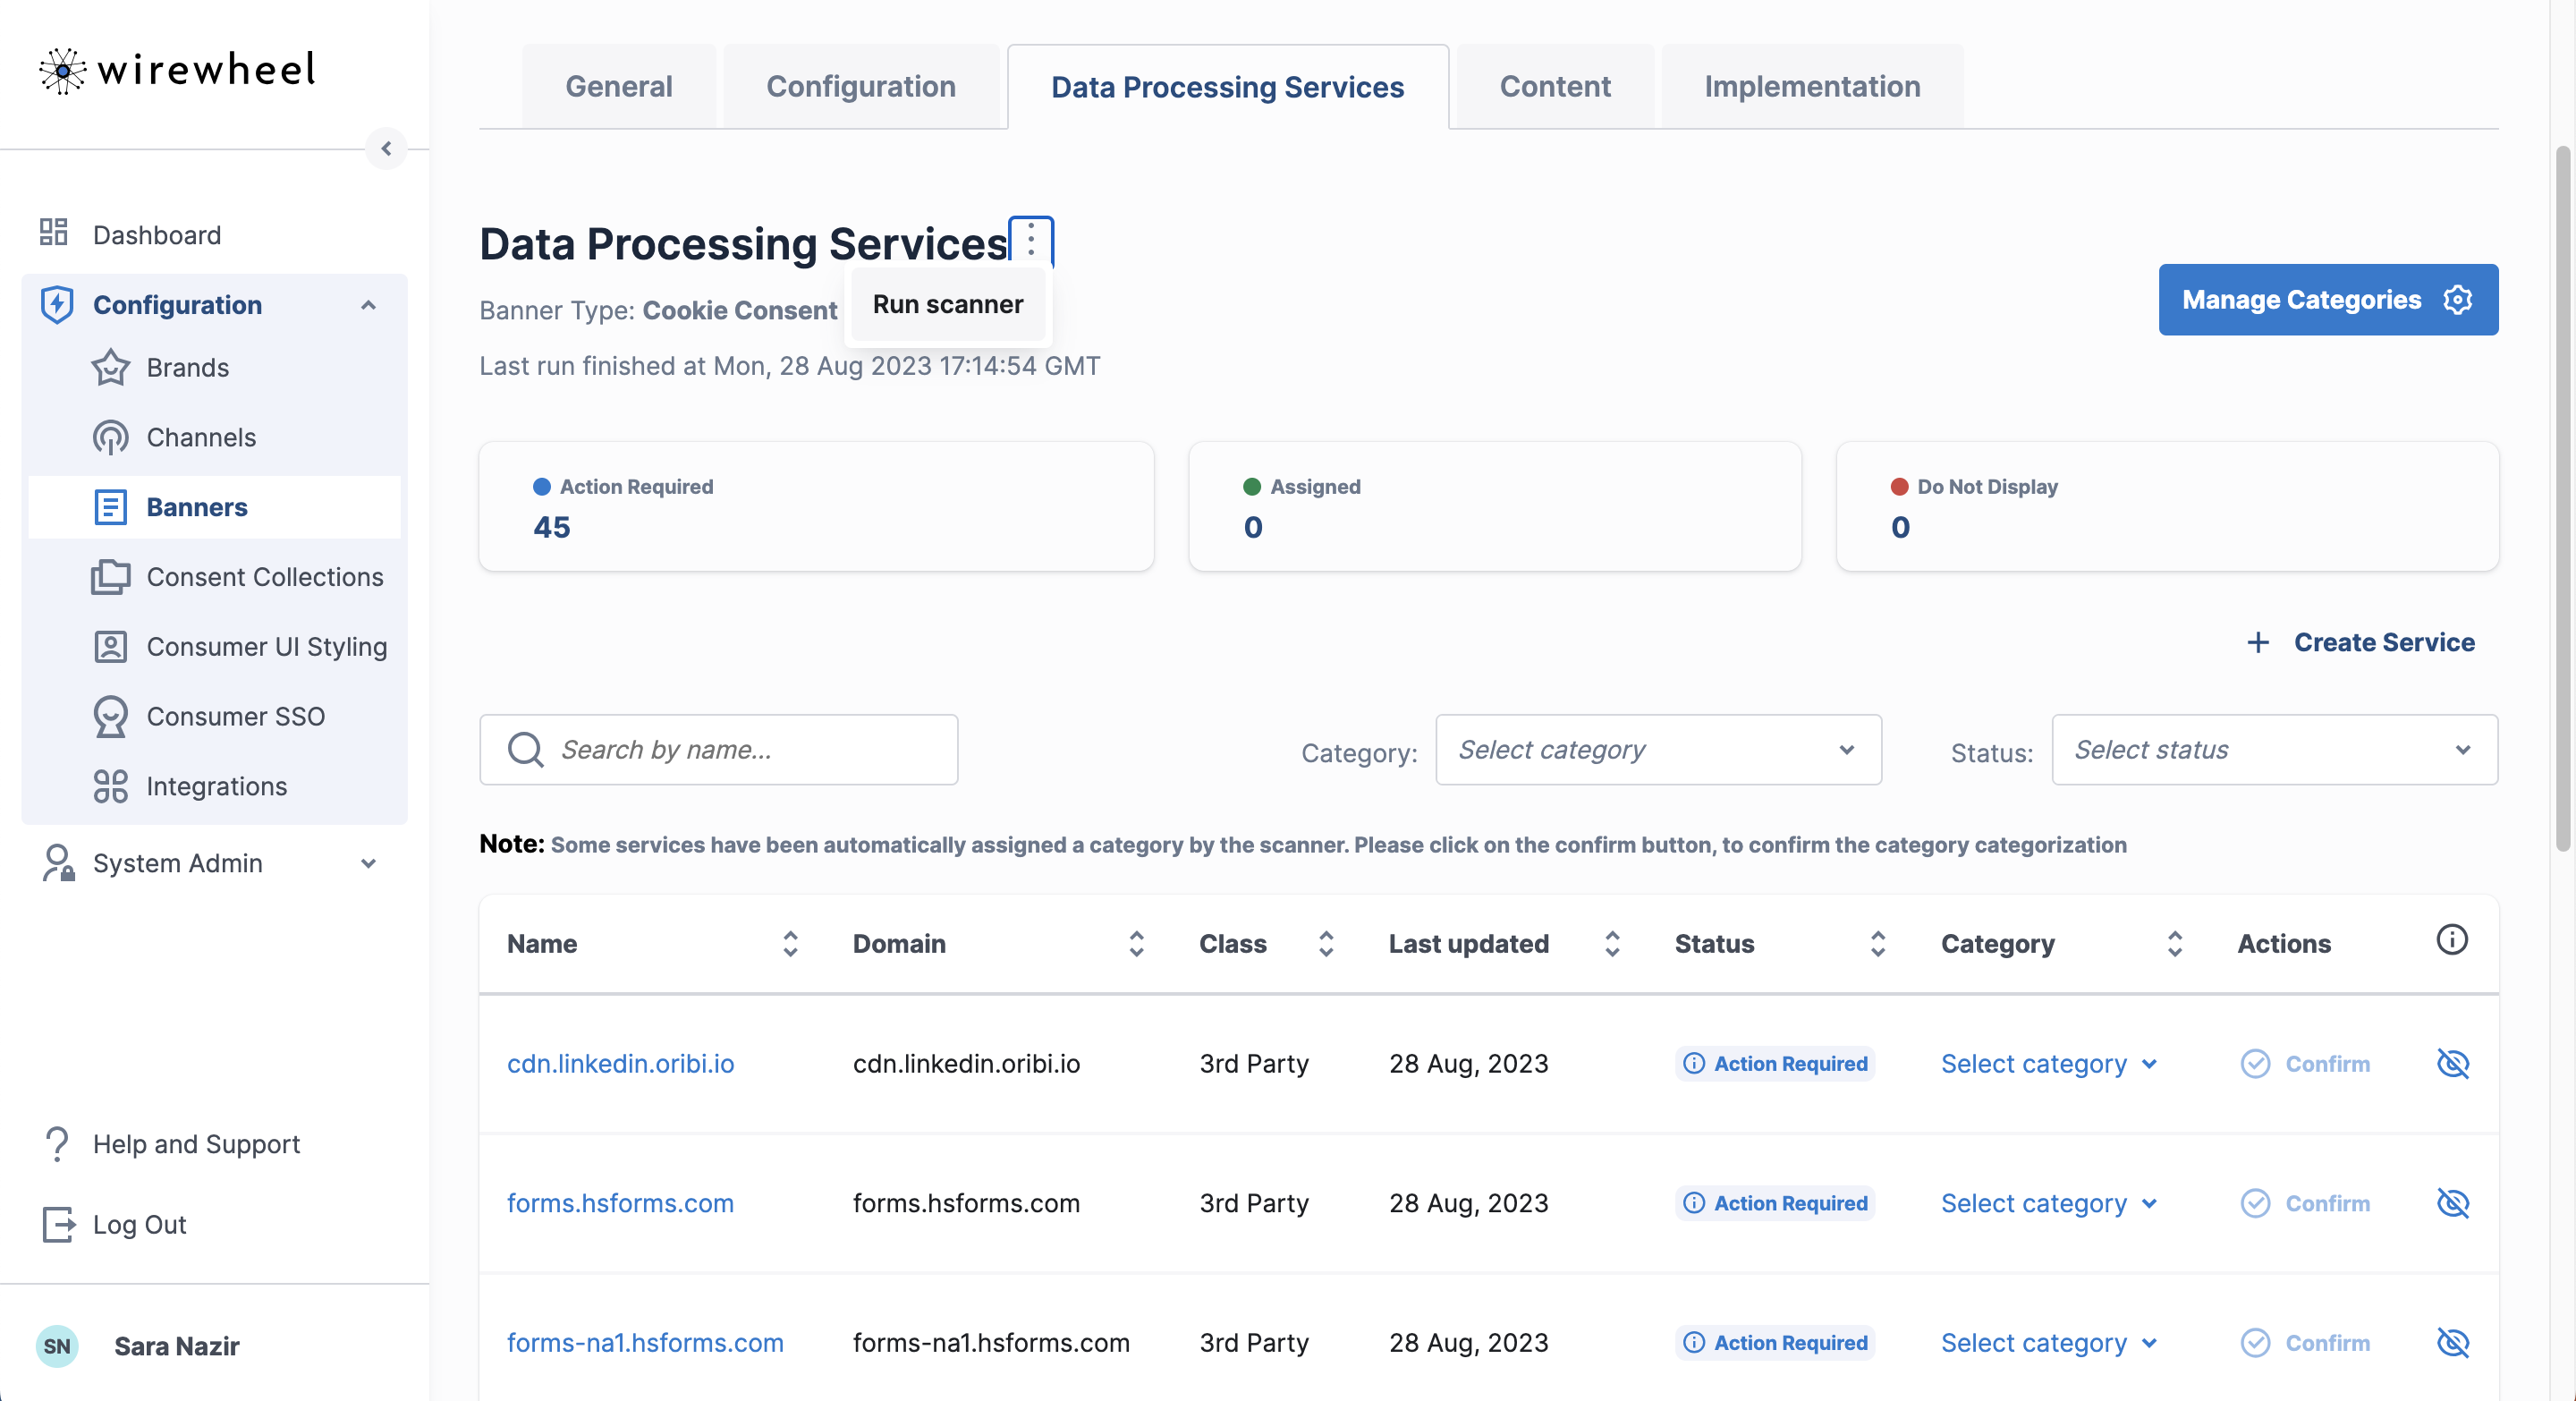
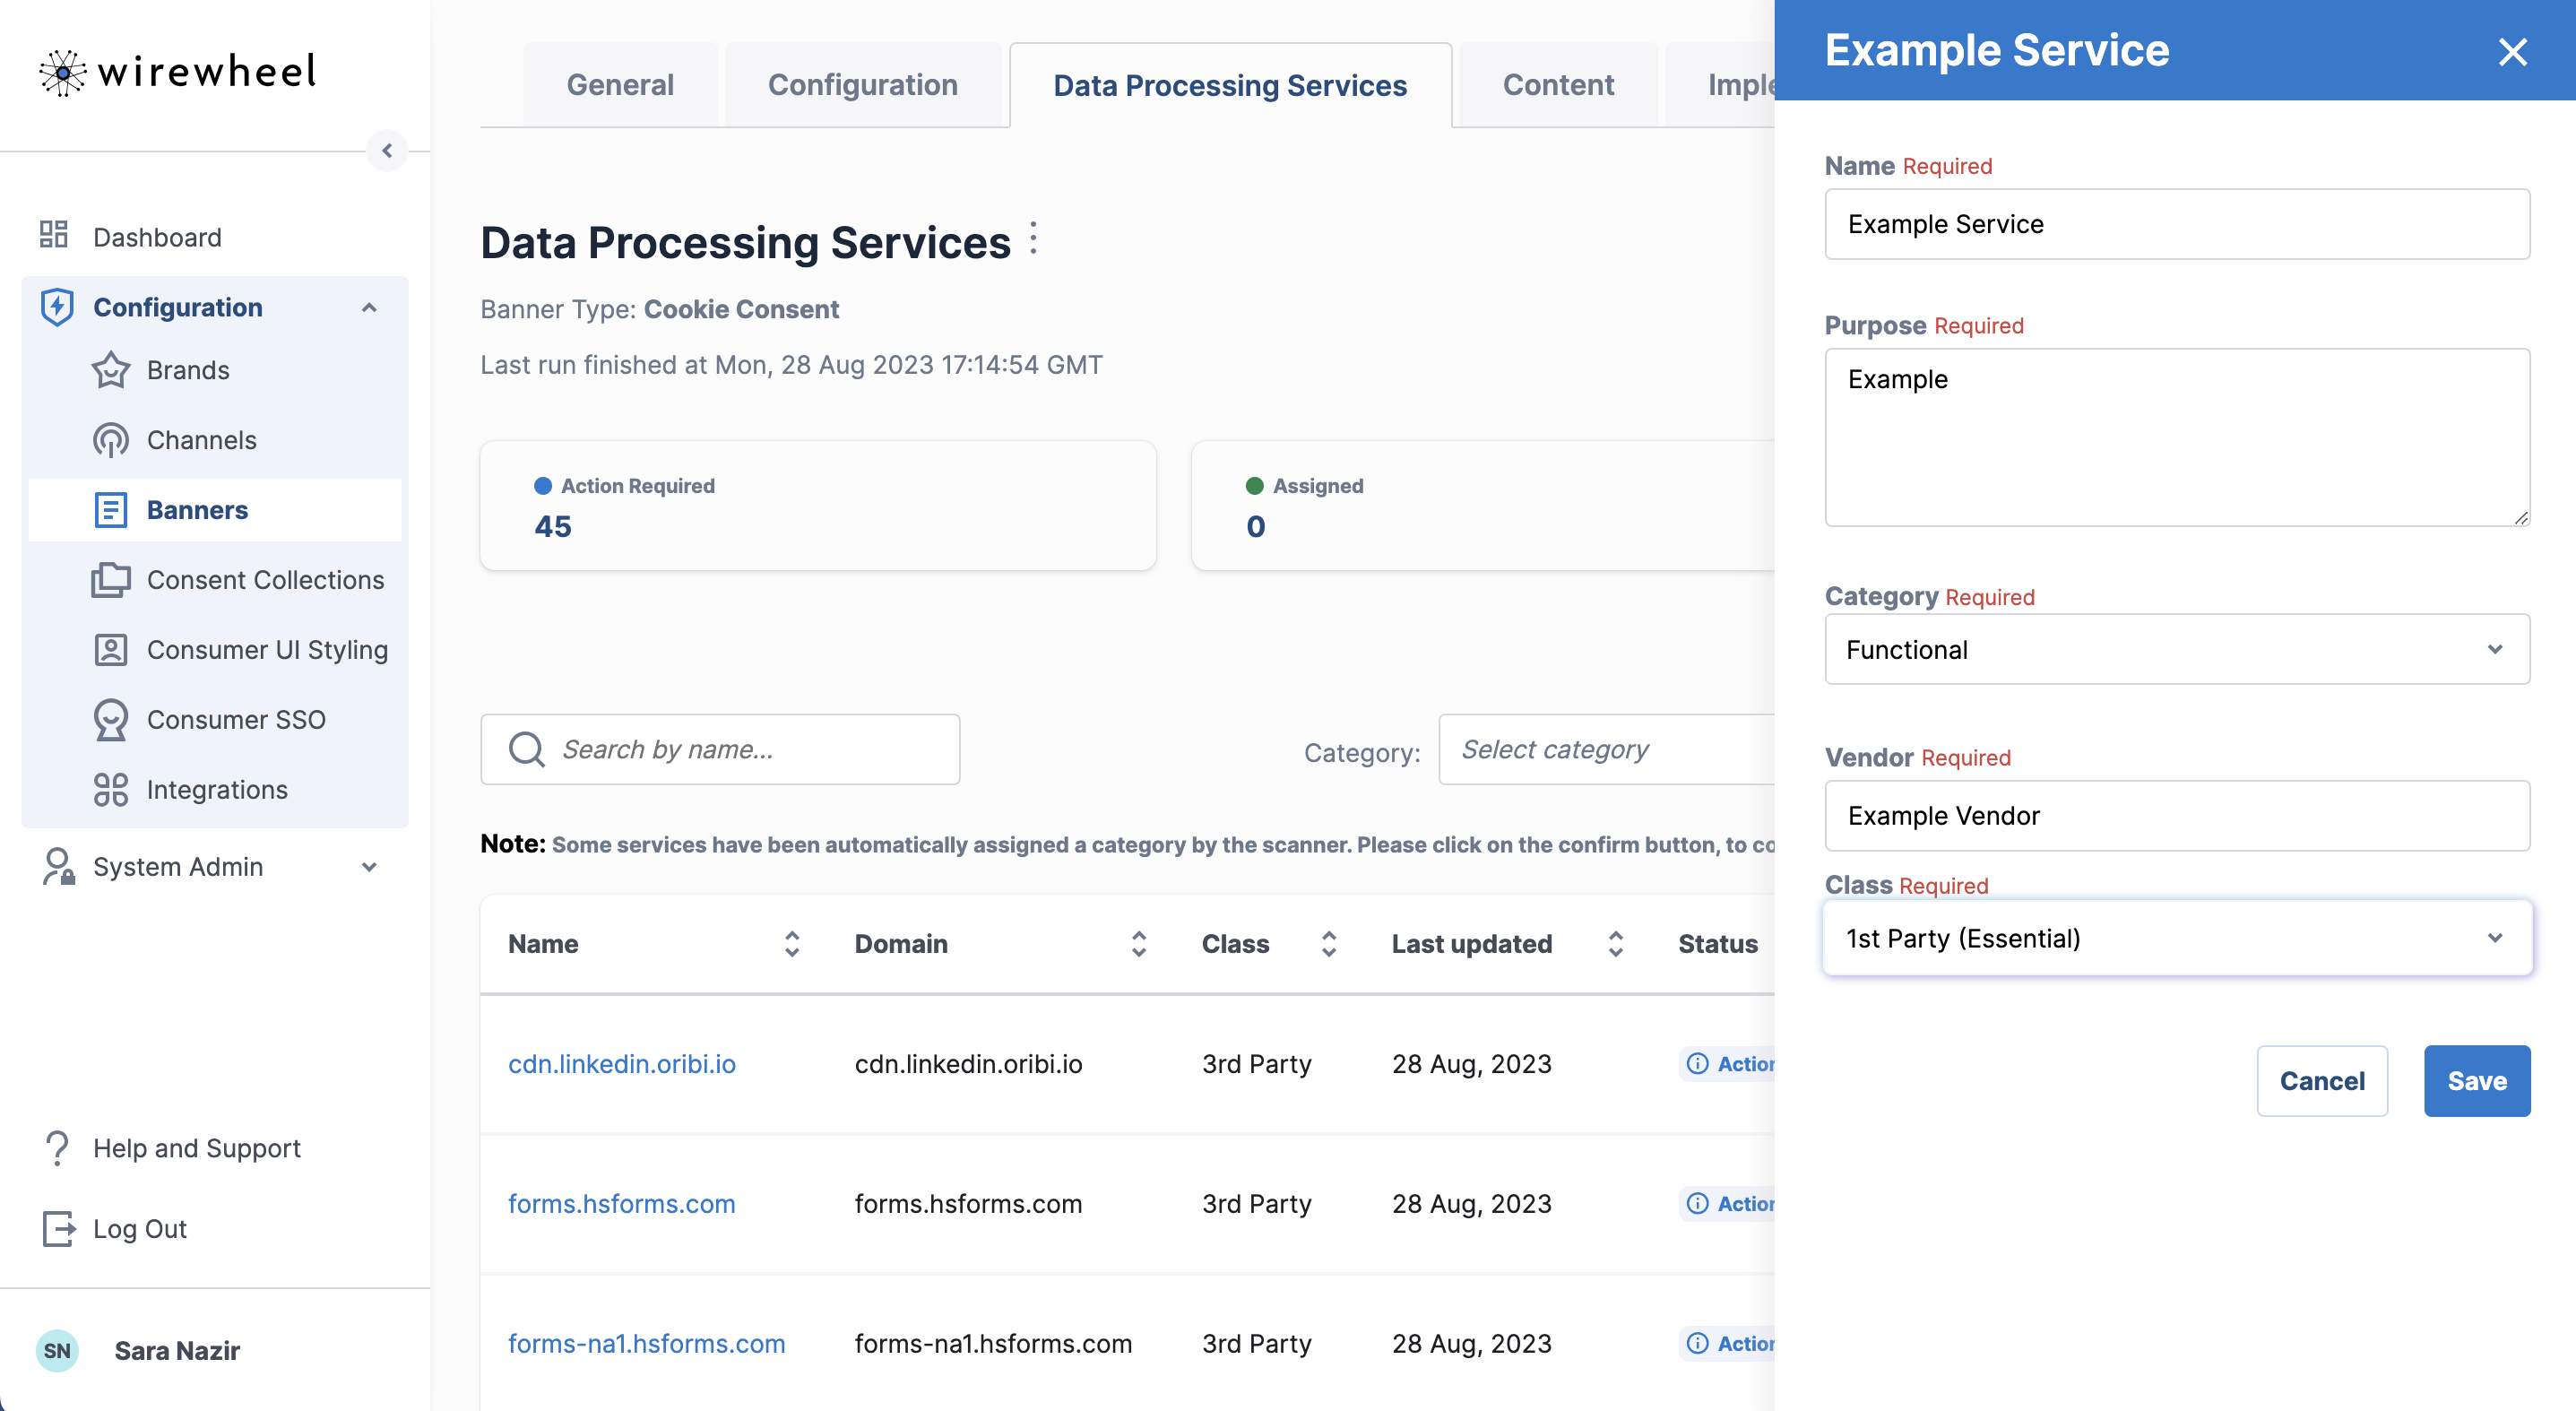
To create a new service manually outside of the Site Scanner, click on Create Service which will open up a flyout with inputs for name, purpose, category, vendor, and class. Once saved, this custom service will be added to the Data Processing Services table.
If categorizes need to be change, click on the Manage Categories button.
This page within Data Processing Services is where default and custom categories can be set up and maintained. Upon every new banner creation, there are four default categories: Essential, Marketing, Analytics, and Functional. Please note the 'Essential' category may not be deleted since they are strictly necessary for consumers. Also note that the Site Scanner will only be able to auto-categorize into these categories.
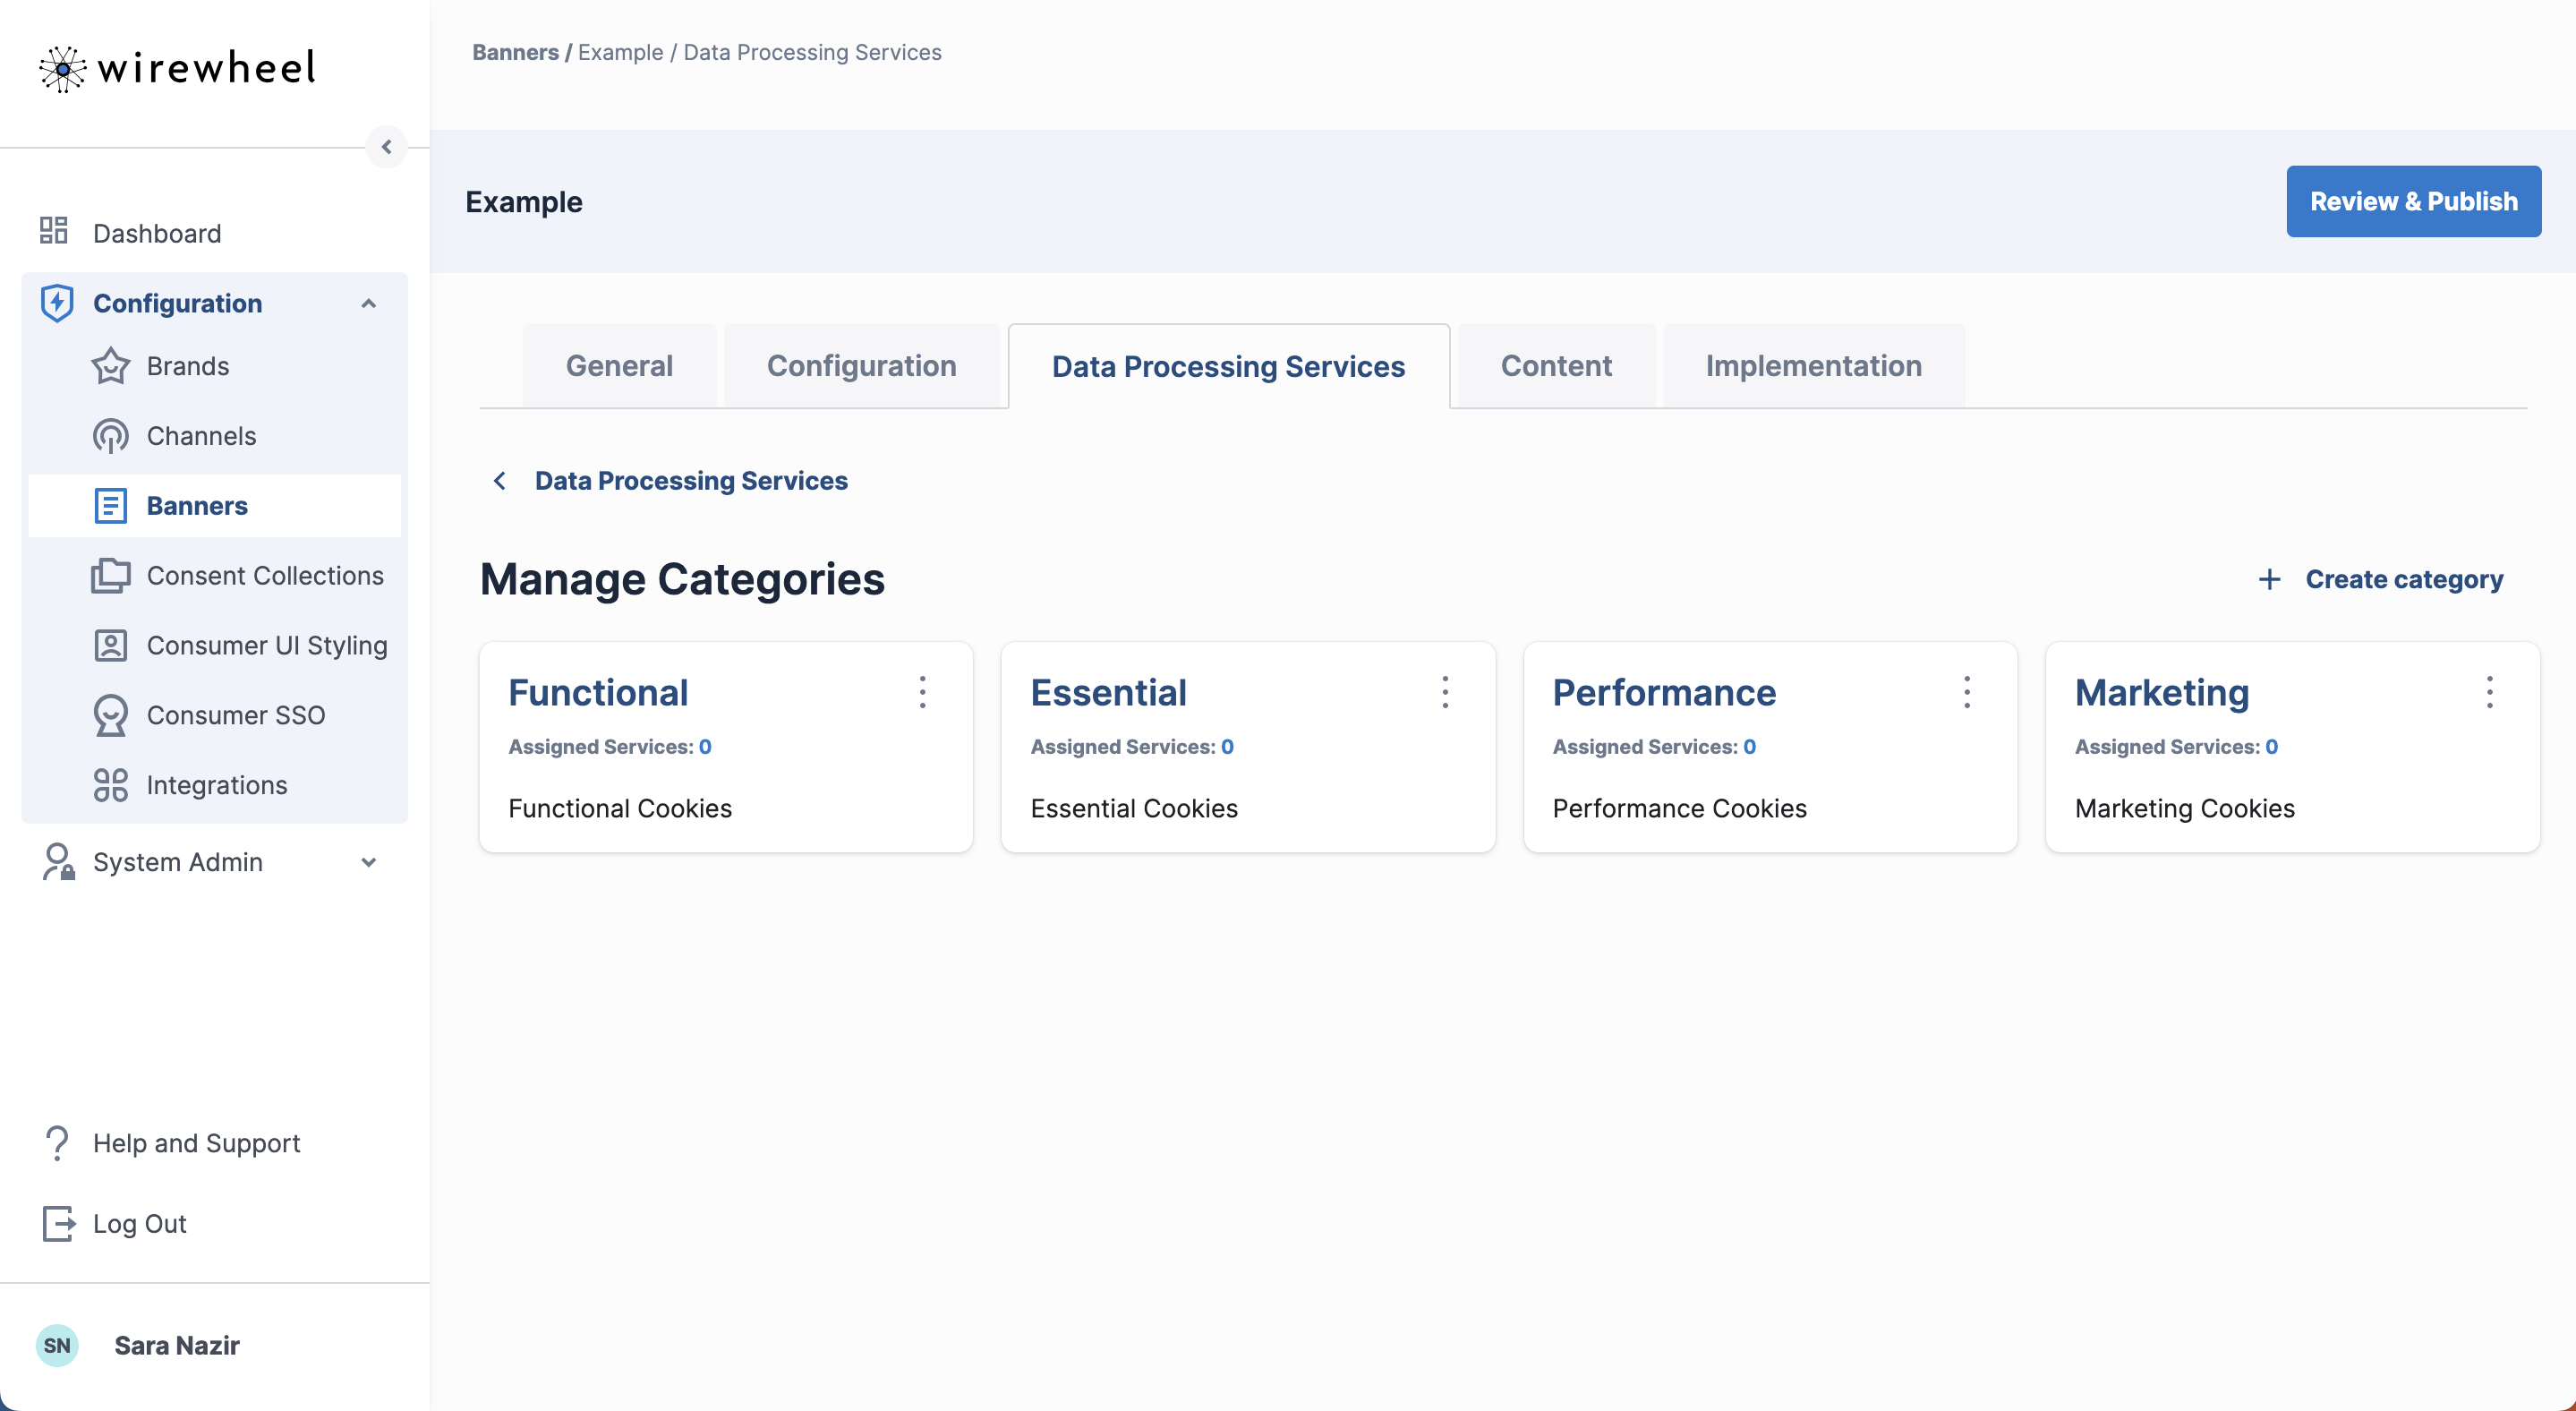
To create a category other than the defaults, click 'Create Category' which will open a right flyout for adding a name and description for a custom categorize. Please note that custom categories are not subjected to be auto classified within the Site Scanner.

If a service needs to be classified as the custom category, it must be done manually in the Data Processing Services table. To return back to the DPS, click the Data Processing Services button.
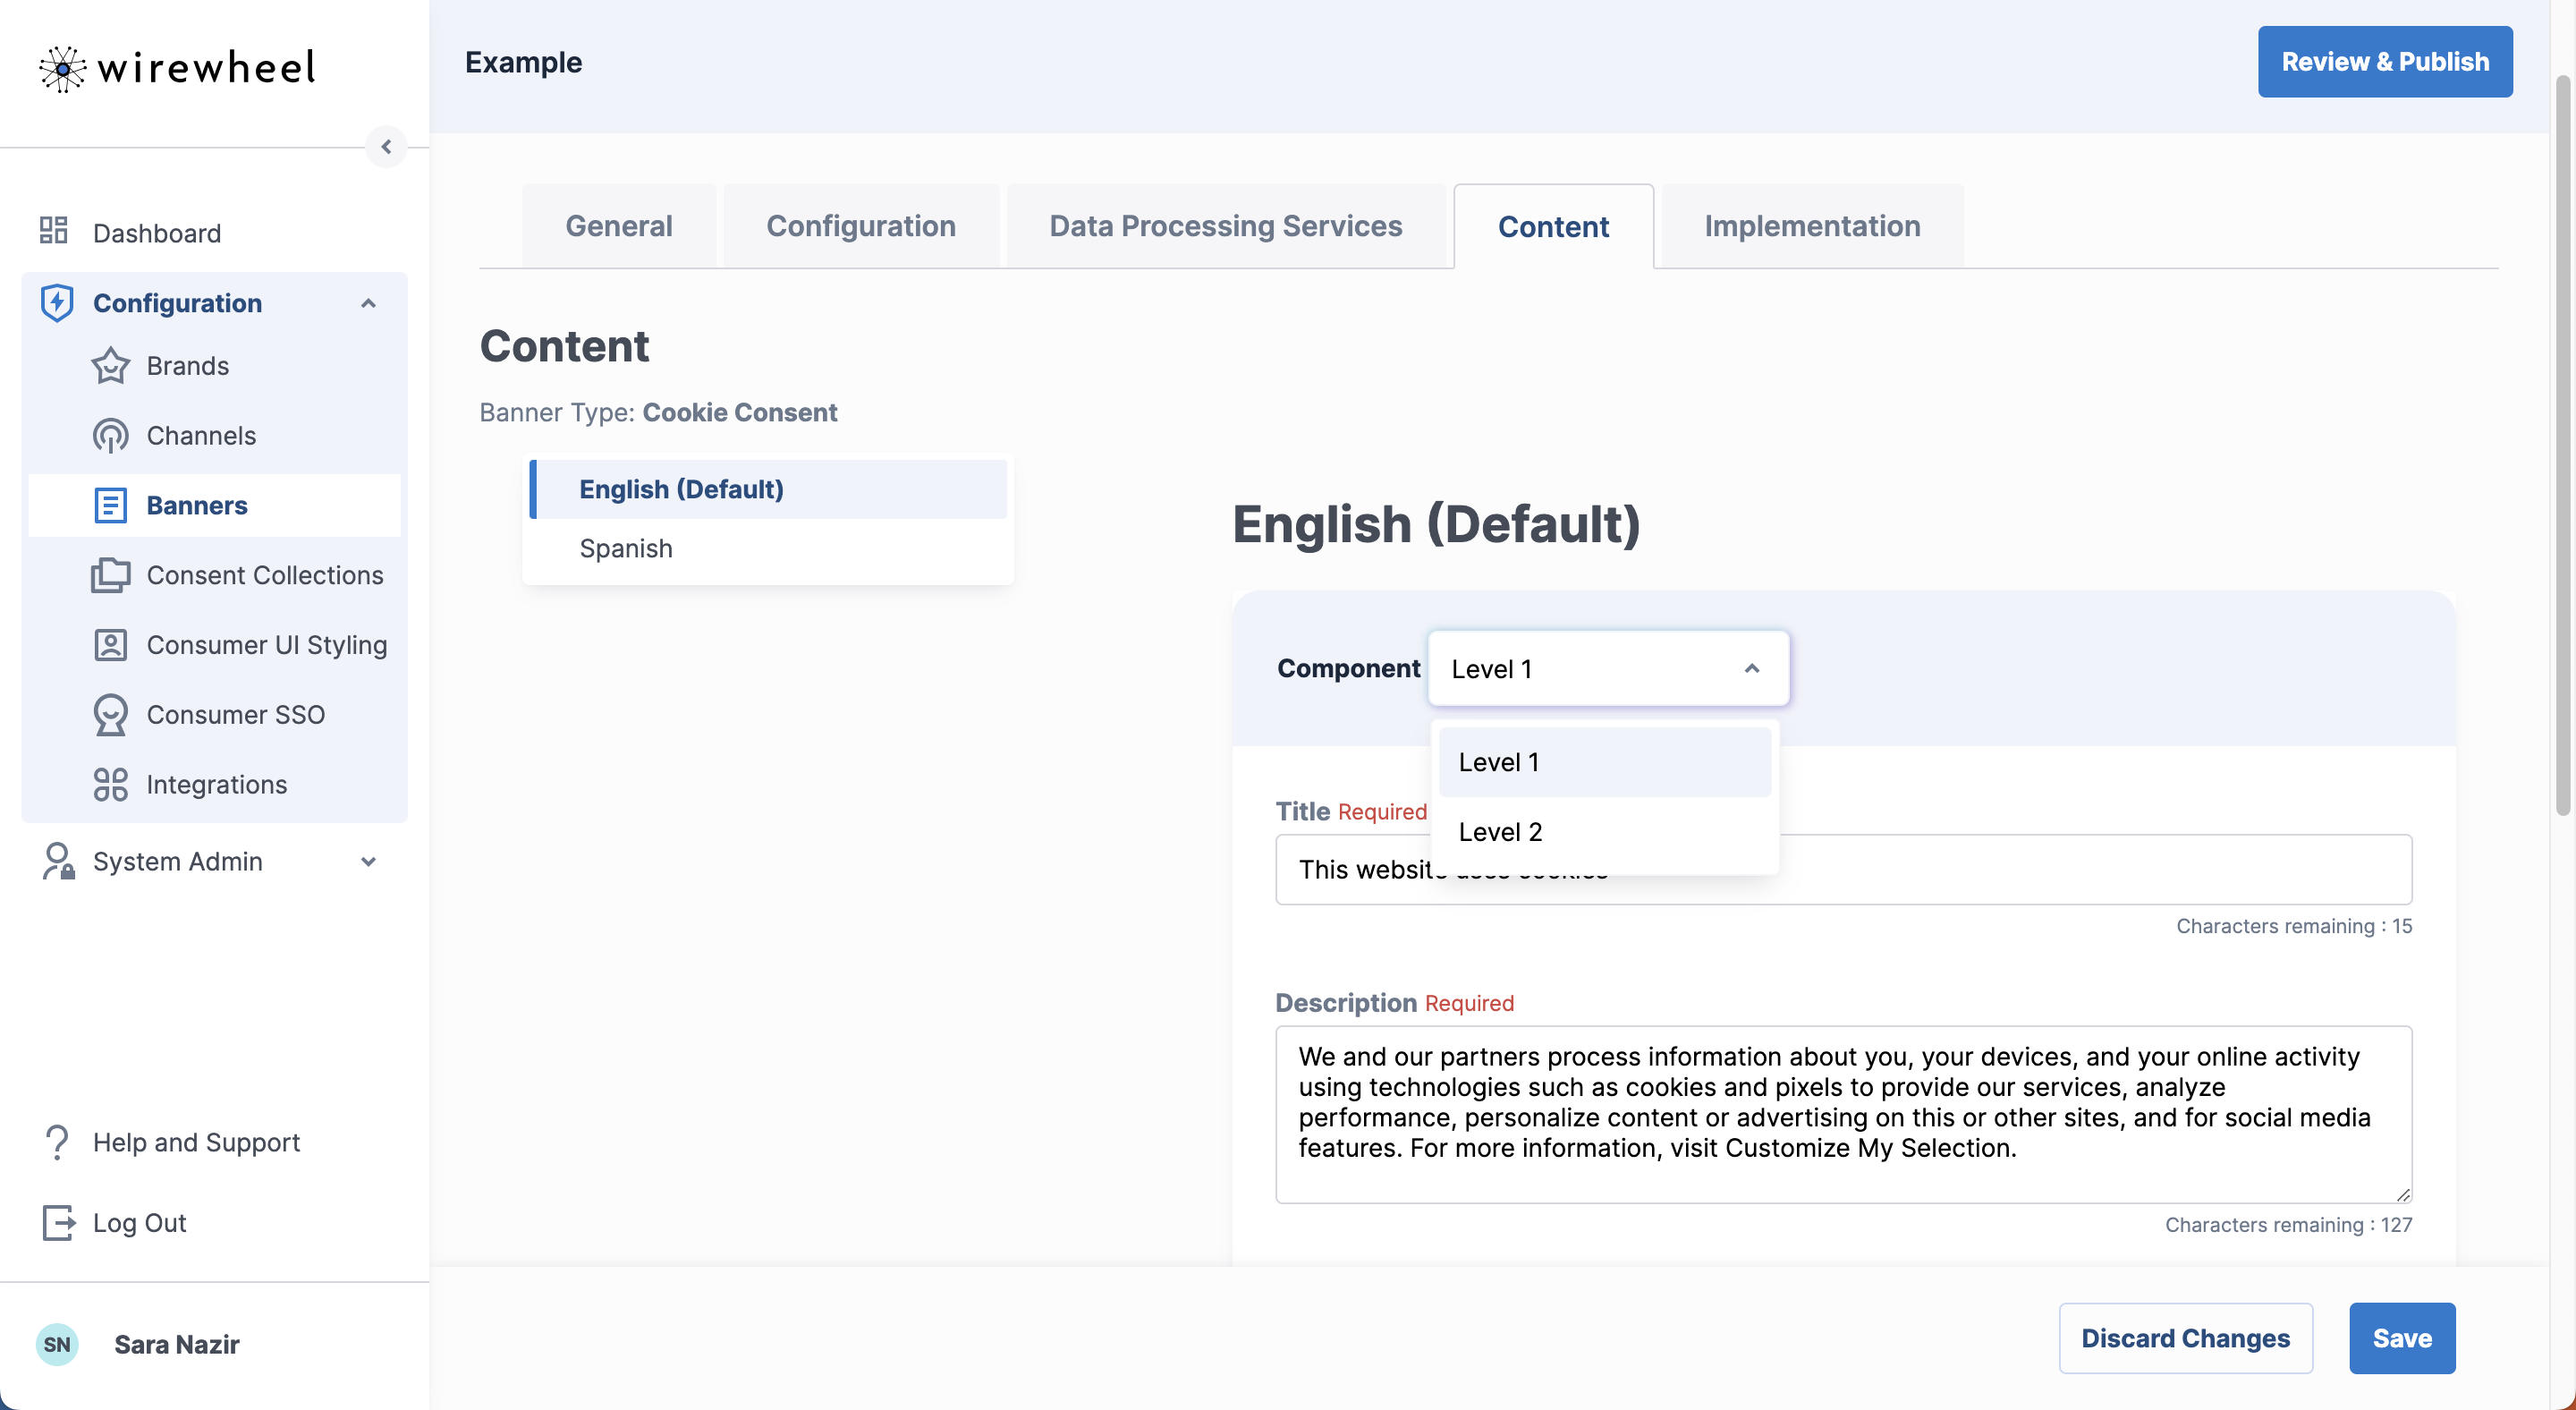
Content
This is where all content for all languages are added. The default language will appear first with all the fields for the Level 1 and Level 2 Banner. Use the component dropdown to switch between L1 and L2.
UPCP has standard content for many languages, and is adding new languages all the time. Each language will be pre-populated with standard language. If the text is blank, then translation will be required. Please contact your Account Manager to request a language if it does not exist in the list.
The selected supported languages will appear listed on the secondary left navigation. Click through the other Supported Languages that were selected from the General page to enter their respective translations. They follow the same format as the default language. Please note all fields for the language(s) are required to be entered before allowing a banner to be public .
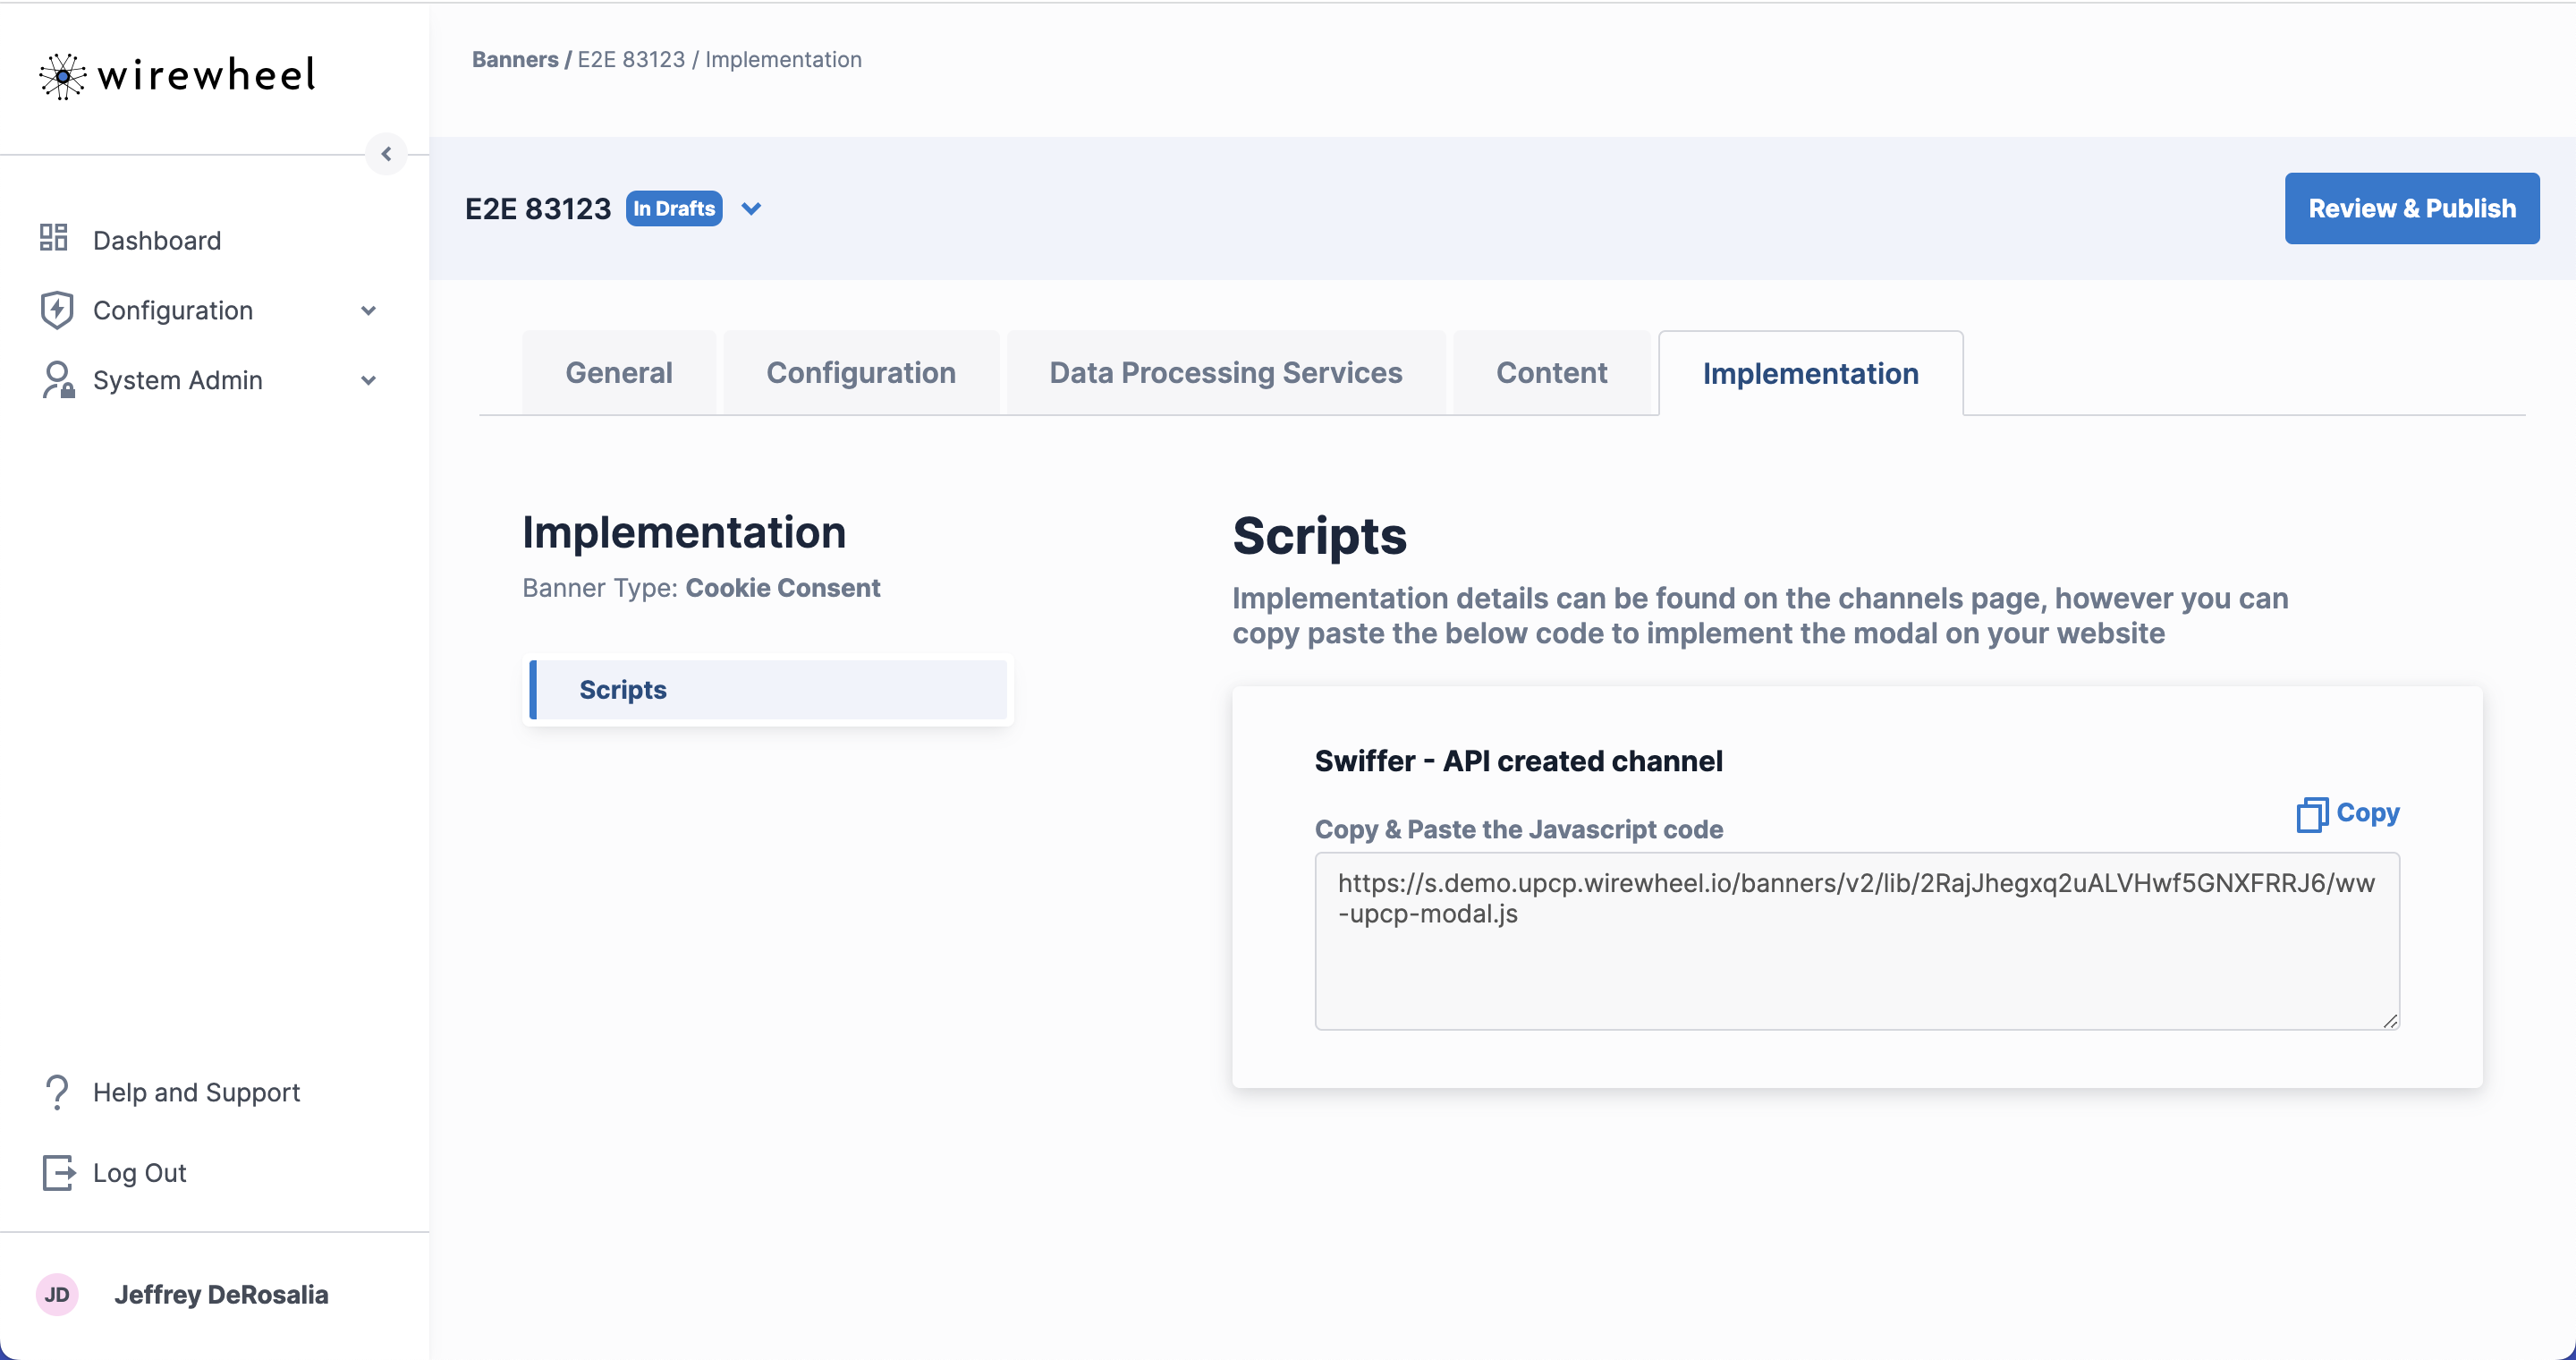
Implementation
When you're ready to add the banner to your site, simply add this JavaScript file.
Remember to publish the modal before adding it to your site!
If you want to place a link on the page to re-open the banner, it would look like this:
<a href="javascript:window.WWUPCP.openModal()">Manage Your Cookie Choices</a>Updated 19 days ago